


Changing table topper Build it yourself
Suitable for your IKEA chest of drawers

Quick link to relevant topics
- Required materials & shopping list
- Required tools
- Limmalands changing table topper for IKEA HEMNES
- Safety precautions
- Changing table topper Build it yourself: Instructions
- Step 1: Build the top
- Step 2: Connect the attachment and chest of drawers lid
- Step 3: Build the changing table shelf
- Step 4: Mount the shelf on the changing table
- Conclusion: Build your own changing table topper
- Convert dimensions for other IKEA chests of drawers
Tools and materials

Assigning the wooden panels

Tools
- Wood screws
- Screwdriver (if available: cordless screwdriver)
- Cordless drill
- Saw (if available: (router) milling machine)
- Sandpaper (if available: router or sander)
- Optional: primer & furniture paint
Limmalands changing table topper for IKEA HEMNES chest of drawers
Incidentally, it's much easier with our changing table topper for the HEMNES chest of drawers from IKEA. All you need is a cordless drill and a screwdriver; we'll prepare everything else for you. The changing table topper is very easy to assemble and attach to the HEMNES. And the result is impressive – the changing table topper fits elegantly onto the chest of drawers and becomes an eye-catcher in any room!
More reasons why the changing table topper is worth it:
- Rounded corners and edges minimise the risk of injury to your baby
- Maximum safety thanks to additional wall mounting
- Generous changing area and plenty of storage space for maximum comfort
- Easy storage of changing accessories thanks to the practical rear shelf
- Easy to clean surfaces
- Significantly more cost-effective than a homemade changing table ( changing table topper) – you save £28.45*
You can find out more about changing table topper here :


Changing table topper Build it yourself: Instructions
Have you gathered all the materials and tools you need for your DIY changing table topper? Then you're ready to get started!
We will show you step by step how to build your own changing table topper for your chest of drawers. It is best to follow the individual steps in these instructions exactly, then nothing can go wrong during assembly.
Before you start building your own changing table topper, however, there are a few important safety precautions you should take.
Safety precautions
As with all manual activities, especially when working with wood, we also recommend taking certain safety precautions and using important protective equipment. This includes:
- Goggles to protect your eyes from debris such as flying sawdust and dust
- Protective clothing, such as protective gowns, gloves and safe footwear
- Ear protection can be helpful for those sensitive to noise if your drill is particularly loud.
- Sufficient lighting is important for working precisely, cleanly and safely
- A safe working environment is extremely important to ensure safety during manual work. It also makes your work much more pleasant. Move obstacles such as chairs and tools lying around out of the way and always make it as easy as possible for yourself when building.
- Technical and manual expertise is required to operate tools and machines safely and properly. Only use technical equipment according to the instructions and be aware of your skills!
If you want to build the changing table topper in the home yourself, you need to be particularly aware that working with wood can create a lot of mess. To counteract unhealthy wood dust in the air as much as possible, you should always ventilate well, or preferably even work with the window open.
Profit tip: moisten the wooden boards with a little water before pre-drilling to nip any dust in the bud.
Protection for changing table topper and surroundings
For safe handling of the changing table, you should always use a protective surface such as a rug to prevent damage to the wood or scratches on the floor. In addition, you should only use screws, drill bits and other tools that are designed for working with wood. This prevents the wood from splintering, splitting or producing an uneven result when drilling or screwing.
Part 1: Building the changing table topper
The first step is to build the part of the changing table that will later rest on the chest of drawers.
For the top, you will need boards A, B and E.
- Pre-drill the boards at the points marked in the diagram to prevent the wood from splitting later.
- Then take the wood screws and connect boards A and B at the pre-drilled points to form a "U".
- Now you can screw board E to the U from below.
- Finally, sand down the edges of the screwed-together changing table top to minimise the risk of injury to your little one. Use a router or sander for this. Alternatively, you can also use ordinary sandpaper. Start with coarse sandpaper and finish with a fine grain to achieve a clean result.


Optional intermediate step:
If you prefer a different colour for the homemade changing table topper than the natural brown of the wooden boards, now is the right time to prime the finished changing table topper and then paint it in the colour of your choice .
Priming protects the wood from liquids and improves the adhesion and opacity of furniture paint.
You can use ordinary universal primer to prime your DIY changing unit. You can find these in any DIY store or online.
In this example, we are using VINCENT universal primer in white.

Part 2: Connecting the top section and chest of drawers
- First, remove the lid of the chest of drawers. As this step may vary depending on the chest of drawers, you should refer to the original IKEA assembly instructions.
- Pre-drill the lid and top section, then screw the removed chest of drawers lid to the changing table topper from below. The boards A should now rest on the lid and board E should seamlessly extend the lid at the rear end.
Important : Do not reattach the chest of drawers lid and changing table topper to the chest of drawers yet. This will be the last step in these instructions.

Part 3: The shelf for the changing table topper
Once you have finished building the changing table ( changing table topper), you can now start assembling the matching shelf. The shelf will be placed behind the changing table ( chest of drawers) and will serve as both a practical storage space for changing accessories and a support for the changing table ( changing table topper).
For the shelf, you will need boards C, D, F, G and H.
For clarity, we will divide the assembly of the shelf into two parts: First, we will build the base, and then attach the front and backsplash.


Step 1: Build the base
The base consists of boards F, 2xG and 1xH.
- If you have not already done so at the beginning of the building instructions, now cut board G in half to obtain two identical pieces.
- Pre-drill and then screw the two new boards G together with board F to form a "U" shape.
- Now attach board H to the top of the U like a lid.
- If board H is slightly wider than boards G, this is not a problem. Just make sure that the excess is on the back so that the shelf will later connect seamlessly to the chest of drawers.

Step 2: Assemble the walls and floors
Now you need the remaining boards C, D and 2x H
- Now attach the pre-drilled front board C to the open side of the base
- Next, screw on the shelf steps. Tip: lay the shelf horizontally on the floor to make assembly easier. Pre-drill the remaining 2xH boards and screw them onto board C at any height along their long side.
- Now attach board D to the front of the shelf ( back side). The board rests on the base.

Optional intermediate steps :
- If you have sockets on the wall, you can now cut suitable recesses into the backsplash D before attaching it
- . You can
- then
- prime and paint the back wall shelf in the same way as the changing table topper. Use a suitable base to prevent scratching the floor or getting primer on it.

Part 4: Mounting the shelf and changing table topper on chest of drawers
Once the shelf has been assembled and, if necessary, the primer and paint have dried, you can move on to the next step: screwing the shelf onto the IKEA chest of drawers.
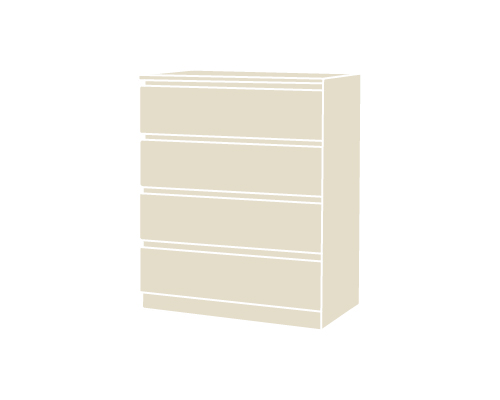
- To do this, first set up the chest of drawers and make sure to pre-drill the holes. Be particularly careful, as drilling mistakes could damage the chest of drawers. Tip: For soft wood (HEMNES and SONGESAND), it is best to use a thin drill bit at a high speed to prevent fraying. You should be careful with veneered wood, as is the case with IKEA MALM. Here, it is advisable to use a slightly lower speed.
- Now take some wood screws and drill the shelf onto the front board C of the back side of the chest of drawers. Make sure that the transition is seamless.
- The final step is to reattach the lid and changing table topper to the chest of drawers. Again, follow the official IKEA assembly instructions.

Pictures of the finished changing table


Conclusion: Build your own changing table topper
And just like that, you've built your own changing table topper! In these building instructions, we've shown you how to build your own changing table in simple steps. You can repeat this process as often as you like and for almost any chest of drawers, because you can never have too many suitable changing options! What's more, having several changing tables brings a bit of variety to your everyday life as a parent!
To ensure that your baby doesn't have to be changed on hard wood, you'll also need a suitable Changing pad. Our new Changing pad, which matches the changing table topper, is made from 100% breathable cotton, making it wonderfully airy, soft and machine washable at 60 degrees. It also fits perfectly with the dimensions of your homemade Changing pad!
Everything you need for your Changing pad :


PUR WINDING KIT

PUR WINDING KIT
Converting measurements for other chests of drawers
If you would like to build the top for a different chest of drawers than the IKEA SONGESAND, you will need to convert the measurements from the shopping list for your chest of drawers. This is particularly easy for the IKEA HEMNES and MALM.
Please note: to avoid discovering your mistake after you have already purchased the expensive wood for the changing table topper and are about to start building, you should consider the following when converting the dimensions: not only do the dimensions of the respective chests of drawers change, but also the ratio of the individual dimensions to each other. This means that the new dimensions cannot be determined by simply calculating the differences! Keep this in mind and nothing will stand in the way of your homemade changing table topper.
Not interested in tricky calculations and costly risks? Then it's worth using our changing table topper for IKEA HEMNES, which we have already introduced to you in this article.
Alternatively, you can also find our changing table topper here :
More topics related to your baby
-

-
 6 clever IKEA hacks for babiesTransform simple IKEA products into functional and pretty baby accessories!Bring mich hin!
