Assembly instructions
HULE STÅNG
Curtain rail for IKEA KURA bed
Made in Germany

⚠️ ATTENTION!
- The contents of the packaging can be swallowed by children.
- Important note: Please note that children must not hang from the bars.
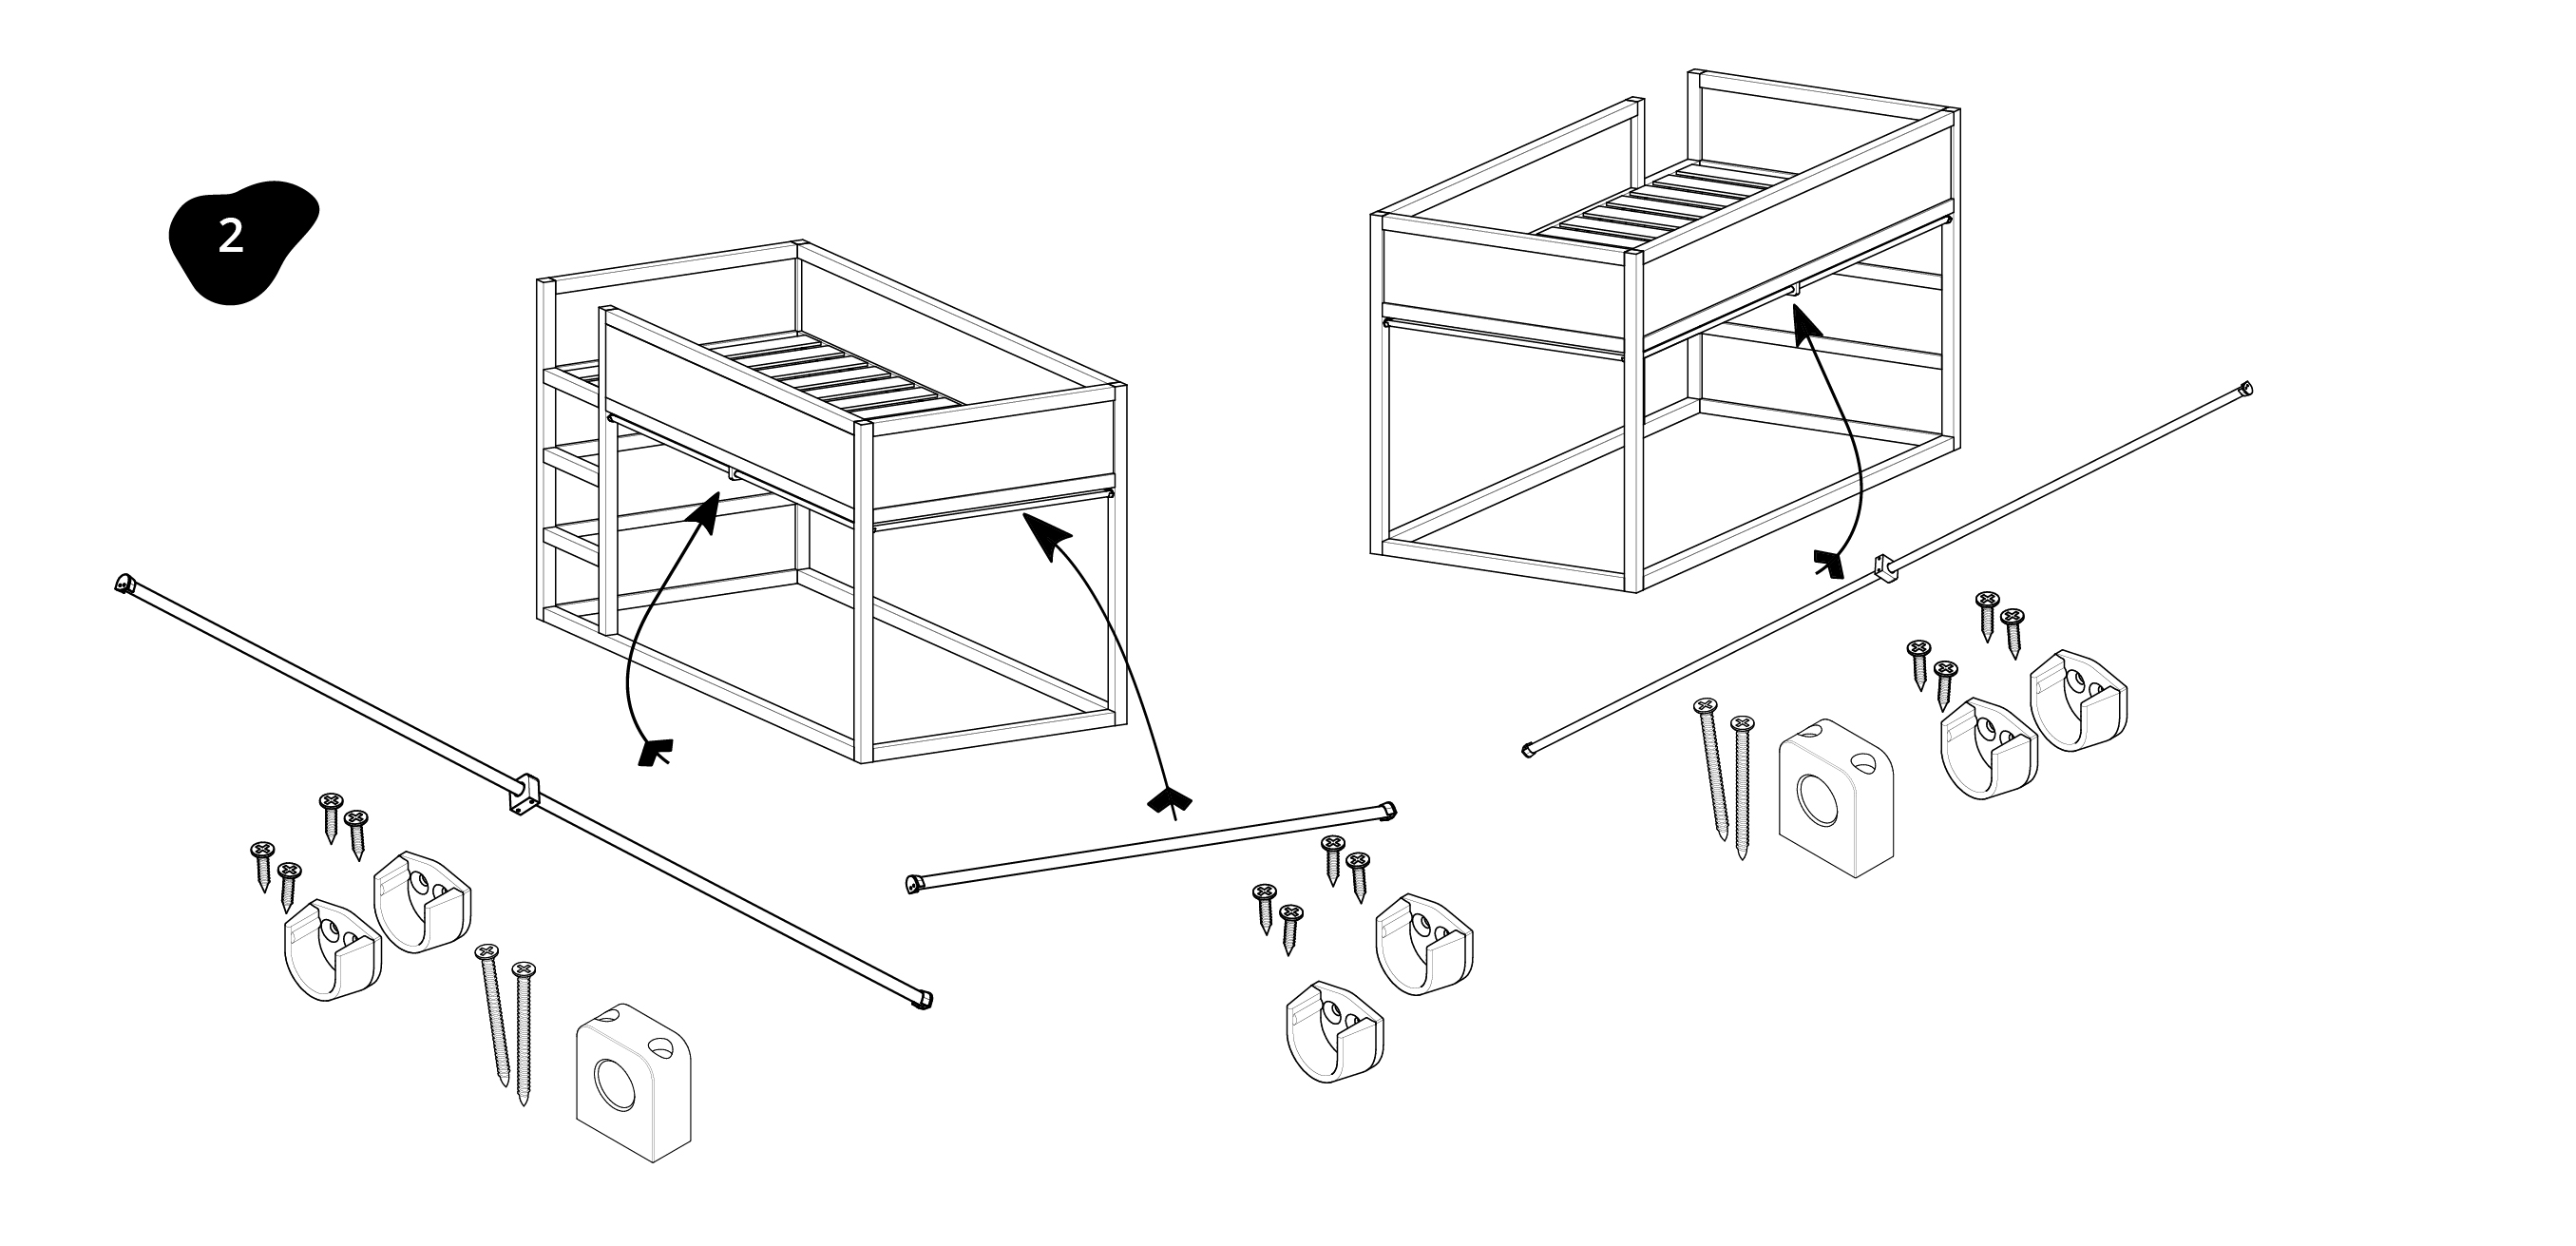
Scope of delivery
Head side
- 1x round bar blank (892 mm)
- 2x plastic tubular cupboard support
- 4x screw for tubular cabinet support

Ladder/rear side
- 2x round bar cut to size (796 or 996 mm)
- 2x plastic tubular support
- 4x screw for cabinet tube support
- 1x wooden centre support
- 2x screw for centre support

Assembly instructions
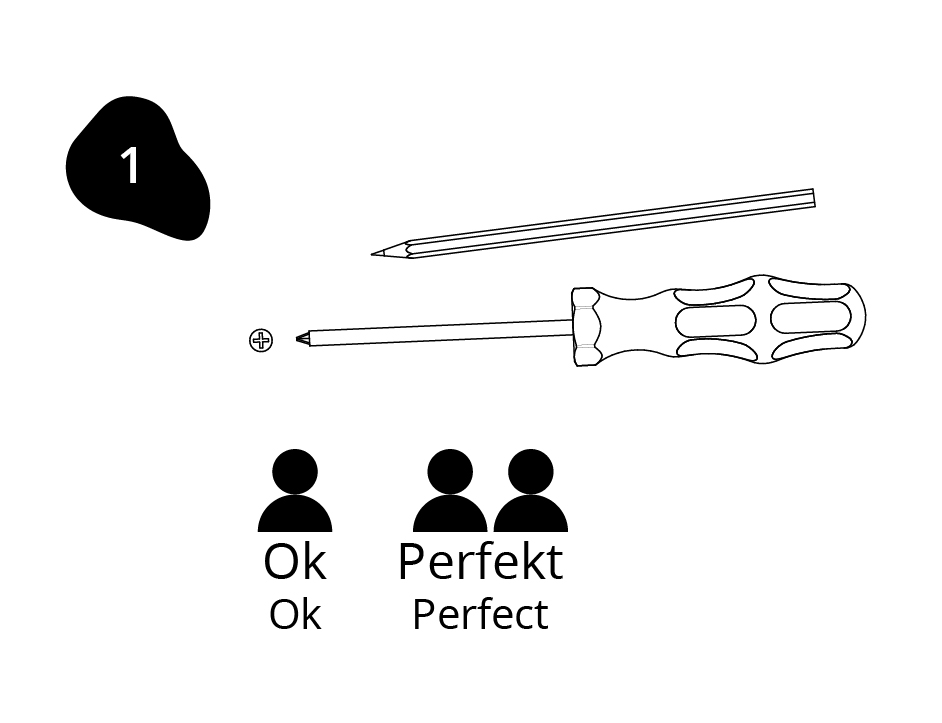
1. What you need:
2. Sort your parts.
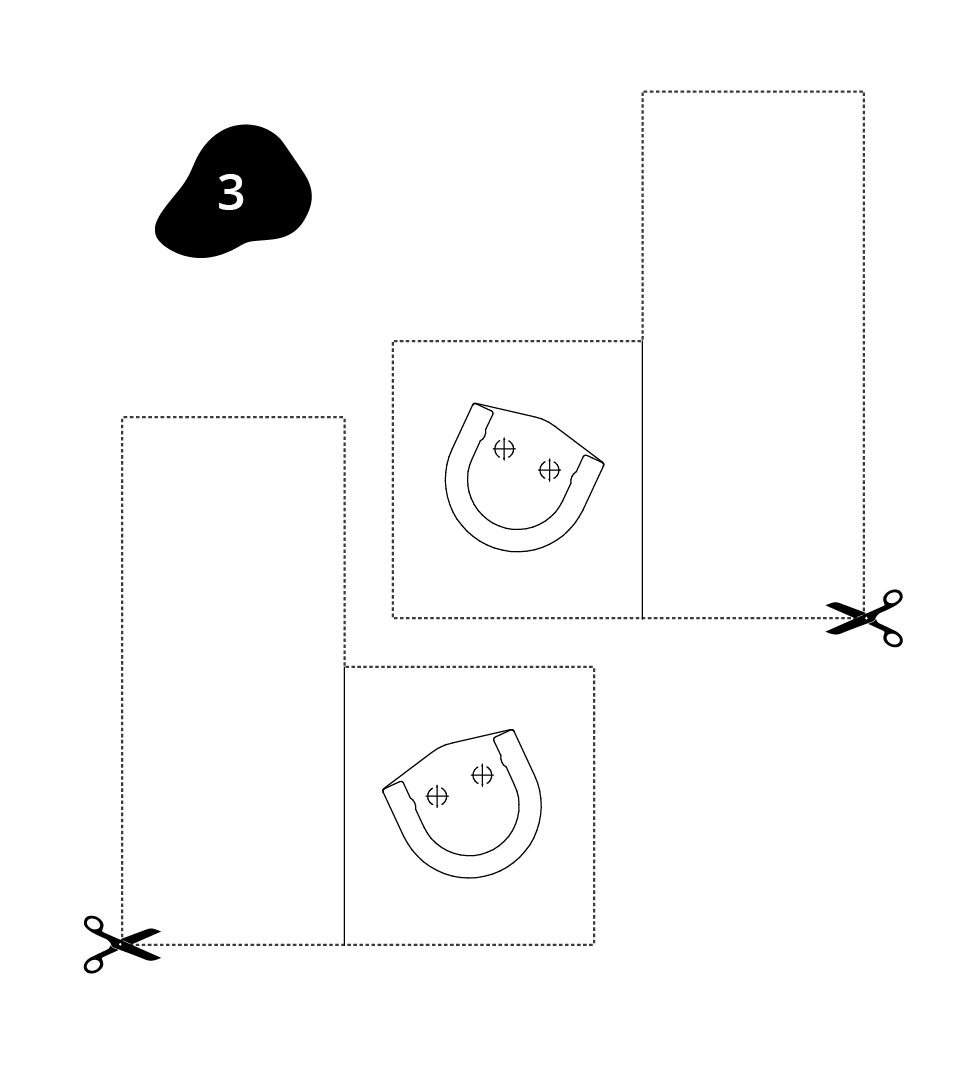
4. Attach the left-hand bracket.
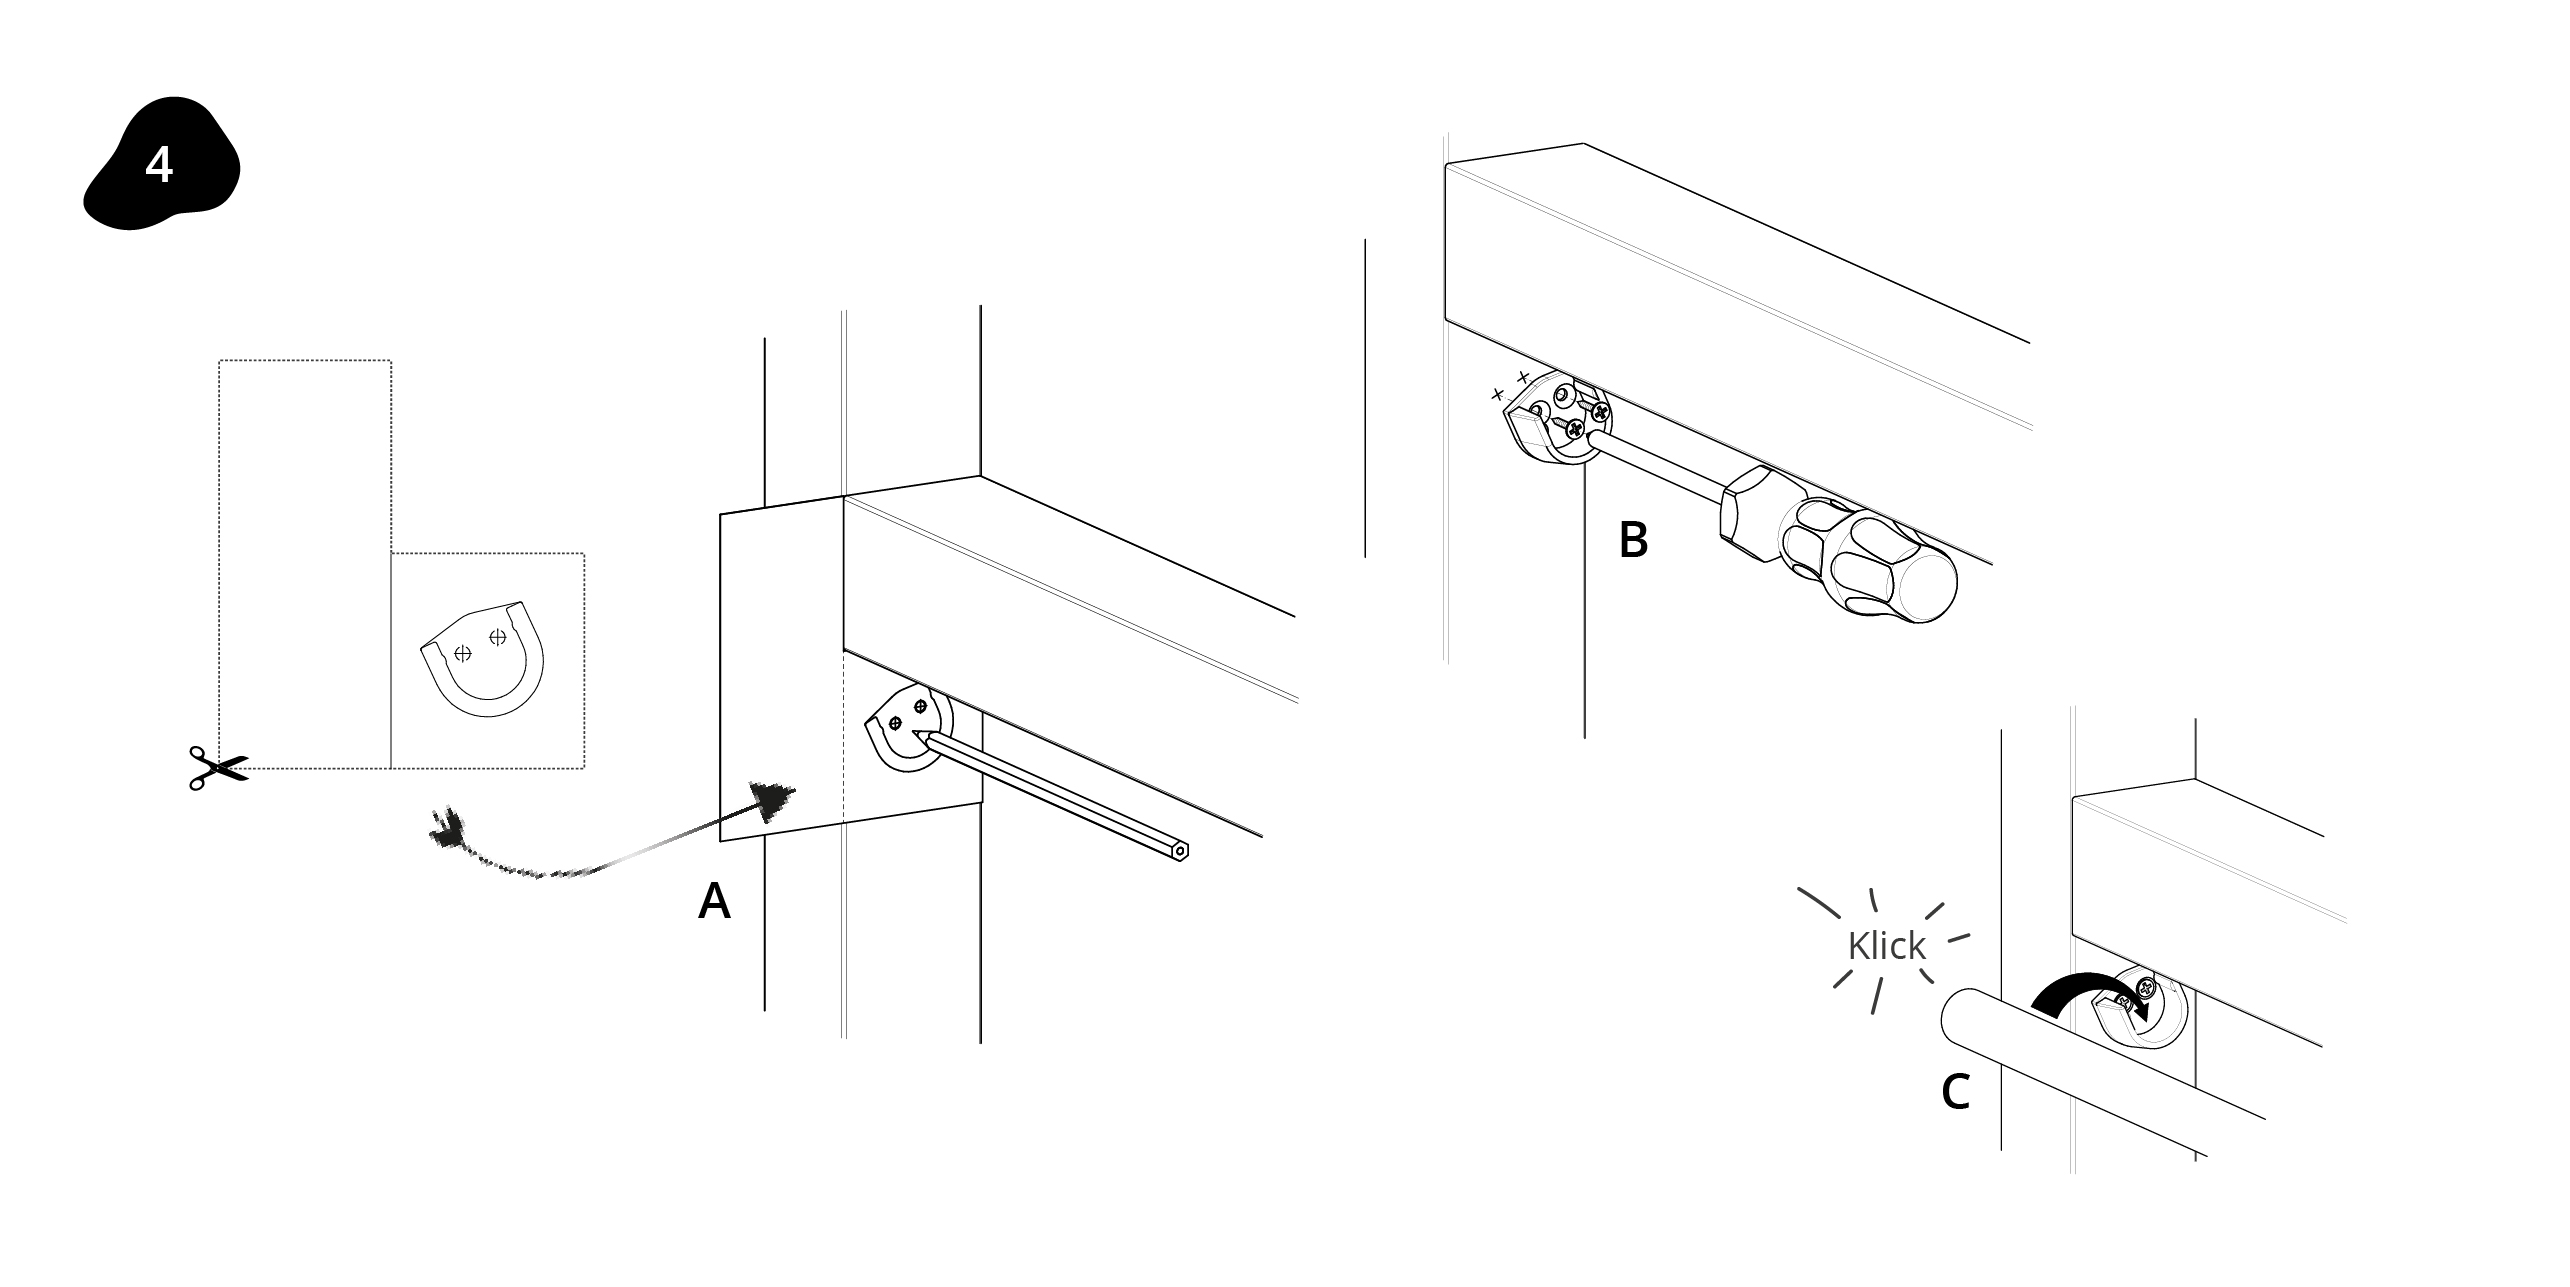
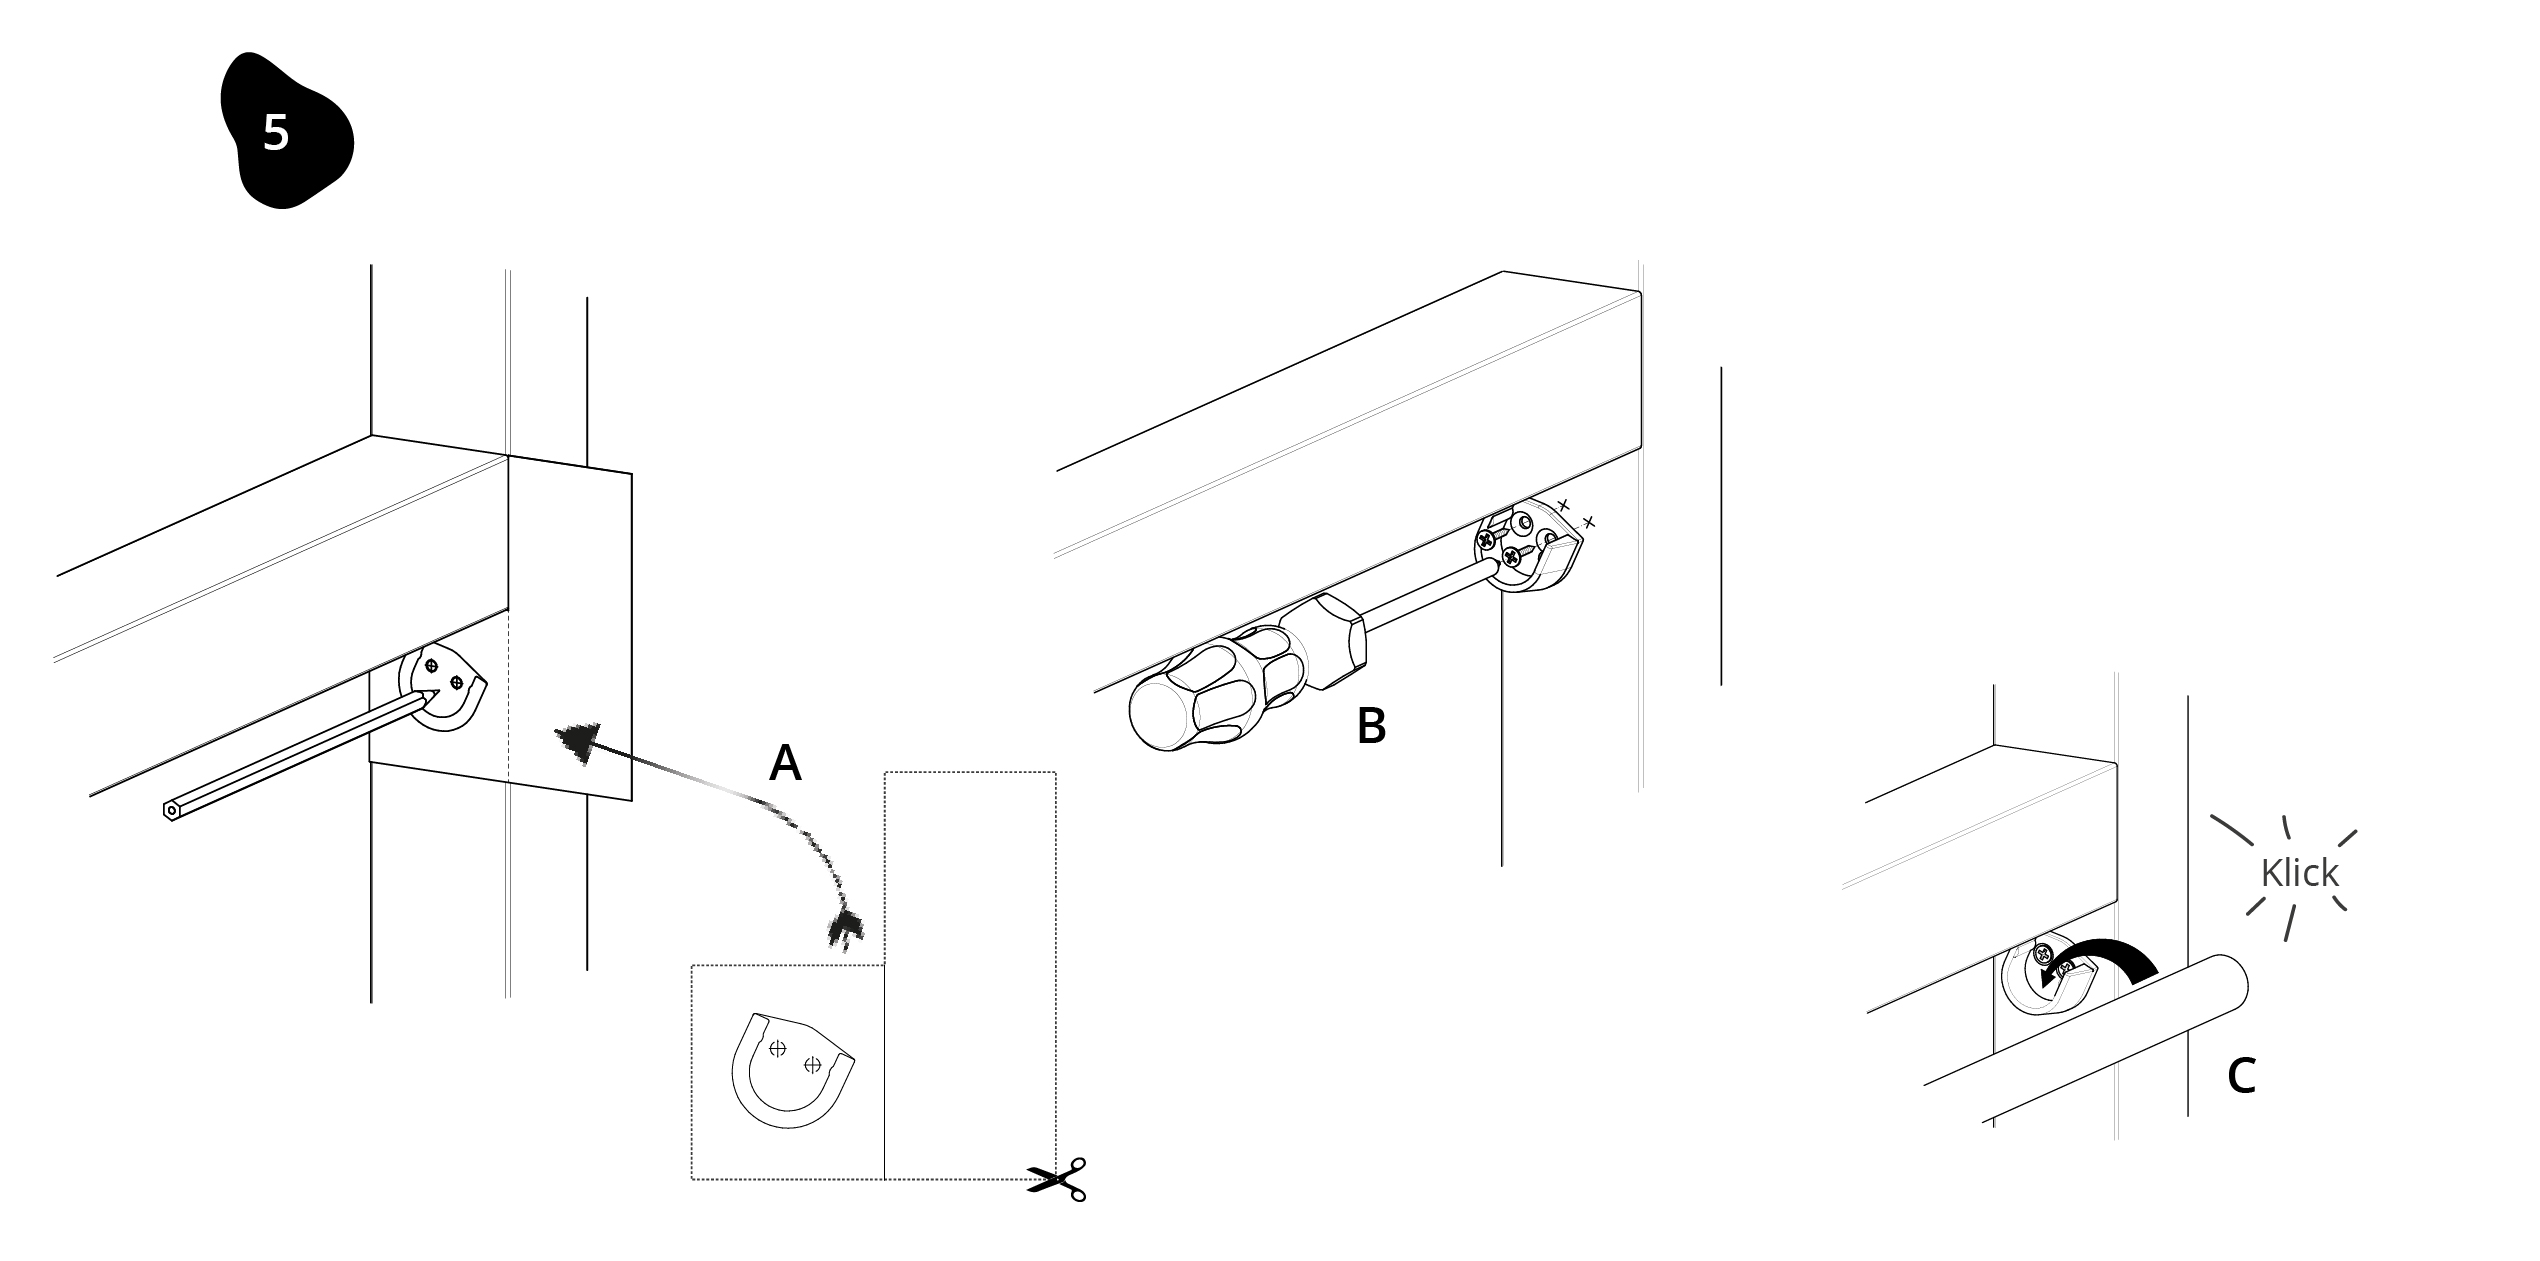
5. Attach the right-hand bracket.
Note: Press the bar into the bracket until it clicks.
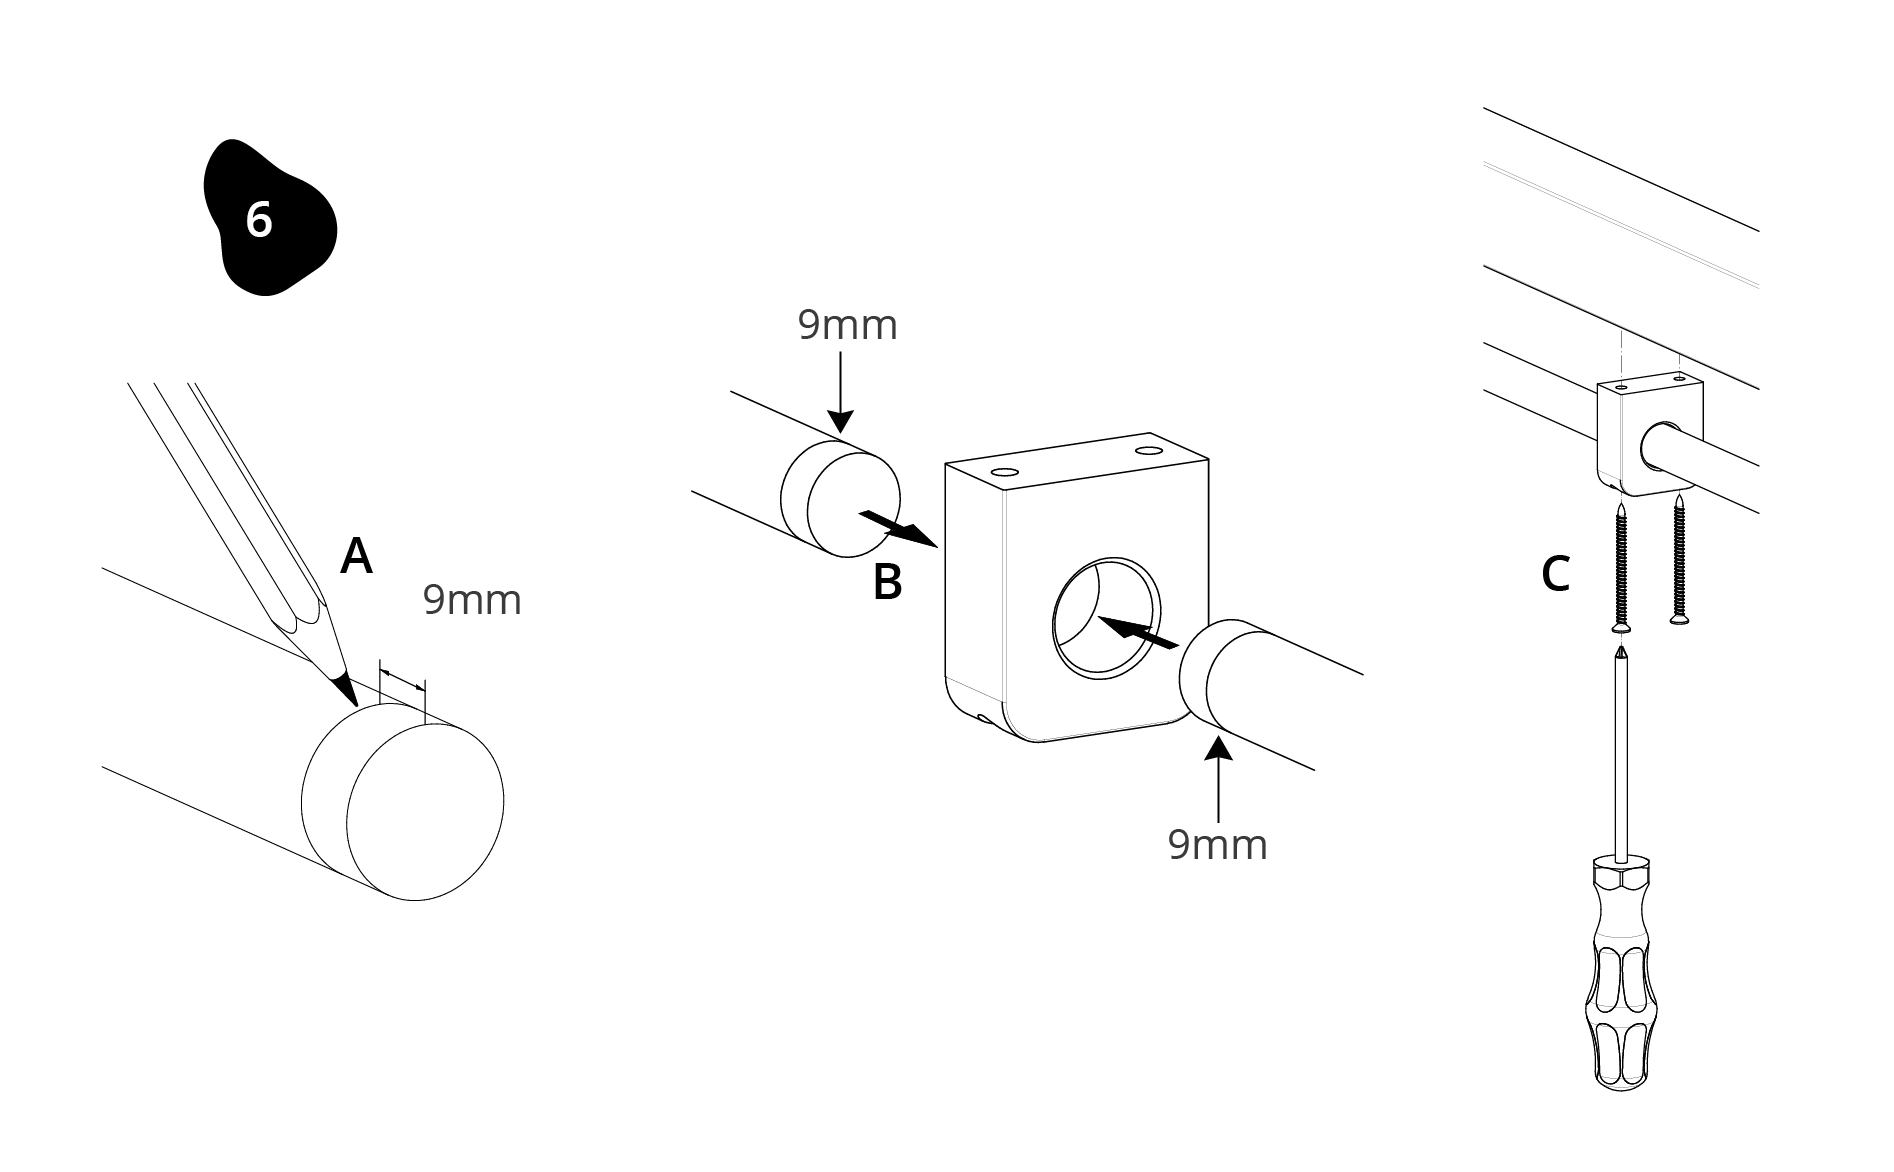
6. Attach the bracket in the centre.
Note: The centre bracket must be aligned so that the two rods are inserted into the bracket in equal parts (each rod 9 mm).
